 Maintaining the integrity of your roof is crucial for the protection and longevity of your home. In Australia, where various weather conditions can take a toll on roofs, cracked or broken tiles are a common issue that needs prompt attention. This article provides a comprehensive guide on how to effectively repair a cracked or broken tile on your Australian roof, ensuring the structural integrity and aesthetics of your home.
I. Assessing the Damage
- Safety First: Before attempting any repairs, ensure your safety by using appropriate protective gear, such as gloves, goggles, and sturdy footwear. Also, choose a day with favorable weather conditions, preferably when the roof is dry and stable.
- Thorough Inspection: Carefully inspect your roof from a safe vantage point, such as using binoculars or observing from a ladder. Look for cracked, chipped, or dislodged tiles, as well as any signs of water damage, leaks, or underlying issues that may have contributed to the damage.
II. Gathering Materials and Tools
- Replacement Tile: Identify the specific type and profile of the broken or cracked tile on your roof. It is essential to source a replacement tile that matches the existing ones in terms of material, size, color, and design. This ensures a seamless repair that maintains the visual appeal of your roof.
- Safety Equipment: Besides the safety gear mentioned earlier, you may also need a ladder, a roofing harness or safety rope, and non-slip shoes to ensure stability while working at heights.
- Tools: Gather the necessary tools, including a pry bar or flathead screwdriver, a hammer, a trowel, roofing adhesive or mortar, roofing nails, and a tile cutter (if needed).
III. Step-by-Step Repair Process:
- Removing the Damaged Tile: Using a pry bar or flathead screwdriver, carefully lift the surrounding tiles to access the damaged one. Gently pry the damaged tile upward, taking care not to damage adjacent tiles or the roof underlayment. Remove any broken pieces or debris from the area.
- Cleaning and Preparing the Area: Thoroughly clean the exposed area, removing dirt, moss, or any loose debris. Ensure the surface is dry and free of moisture before proceeding with the repair.
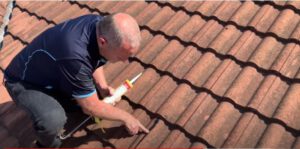
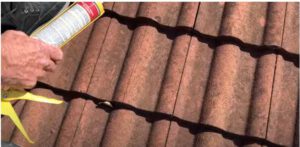
- Applying Roofing Adhesive or Mortar: Apply a layer of roofing adhesive or mortar to the underside of the replacement tile. Use a trowel to spread the adhesive evenly, ensuring full coverage. Alternatively, if using mortar, follow the manufacturer’s instructions for mixing and application.
- Placing the Replacement Tile: Carefully position the replacement tile in the vacant spot, aligning it with the surrounding tiles. Press it firmly into place, ensuring a secure bond with the adhesive or mortar. Adjust the surrounding tiles as necessary to create a uniform appearance.
- Securing the Tile: To reinforce the repair, use roofing nails to secure the replacement tile in place. Drive the nails through the nail holes in the tile, being careful not to crack or damage adjacent tiles. Use the hammer to secure the nails firmly but avoid excessive force.
- Realigning Adjacent Tiles: Check the alignment and positioning of the adjacent tiles. Gently tap or adjust them to ensure a consistent appearance and a tight fit with the replacement tile.
IV. Post-Repair Considerations
 Inspection: Once the repair is complete, conduct a thorough inspection of the repaired area and the surrounding tiles to ensure proper alignment, stability, and a seamless integration of the replacement tile.
- Regular Maintenance: To prevent future damage, maintain your roof by conducting regular inspections and addressing any issues promptly. Clear debris, leaves, and moss regularly to prevent water buildup and potential damage to the tiles.
- Professional Assistance: If you are unsure about the repair process or encounter extensive damage, it is advisable to seek professional assistance from a qualified roofing contractor. They have the expertise, tools, and experience to handle complex repairs and ensure the long-term durability of your roof.
Conclusion
Repairing cracked or broken tiles on your Australian roof is a manageable task with the right knowledge and tools. By carefully assessing the damage, gathering the necessary materials, and following the step-by-step repair process, you can restore the integrity and visual appeal of your roof. Remember to prioritize safety, conduct regular maintenance, and seek professional help when needed to ensure the long-lasting protection and stability of your home.